Thursday 28 July 2016

Create a transparent shape with border only

Create a transparent shape with border only


Step 1 > Right click Rectangle Marquee tool and select the shape as per your requirement.


Step 2 > Drag the mouse until the marquee create your required shape


Step 3 > Go to Edit Menu and Select Stroke you will get stroke dialog box


Step 4 > Set the Width,Color as per your Border color and width requirement


Step 5 > Set the location
               ( Inside : - the border appears inside of the Marquee line
                 Center : - the border appears centered over the Marquee line
                Outside : - the border appears outside of the Marquee  line )

Step 6 > Opacity as per your requirement and press OK


Step 7 > then click on layer or press [Ctrl]+[D] see the Result


Using Mode: Dissolve


See Result


How to apply border on the right and bottom only

How to apply border on the right and bottom only

Step 1 > Draw the Shape and check the Property Panel (make Border 0 pt)


Step 2 > Right click on Layer and Select the Blending Option


Step 3 > Select the Inner Shadow 
Step 4 > Select Blend Mode Normal and Set color of Shadow
Step 5 > Move the angle to -45
Step 6 > Set the size of shadow (border) as per your requirement.


Result:-


How to apply border on the  bottom only


Same above steps you have to follow only change the Angle of the Shadow.


Result : -


How to apply border on the Top only

Same above steps you have to follow only change the Angle of the Shadow.


Result : -

Conclusion:-

Only need to change the Angle and see the Preview and you can give the border as per your need.


Photoshop Layers Panel Essentials

Layers Panel and Use masks to hide layers in Photoshop

 Changing The Preview Thumbnail Size

Step-1> Click on small menu icon(right side)


Step-2> Select Panel Options


Step-3> Select as you wish to see the Thumbnail Size

 Result as below Image

Alternate option : - Right Click near Layer Panel and get the option to select the Thumbnails size 


Layer Mask : -


> Layer Mask allows you to control a layer's level of transparency or Opacity.
> It is useful because it will keep your original image as well and cover your original image with     mask.

How to create Layer Mask 

Turning Off Default Layer Masks


Hide(erase) the second Image Background


Use Brush Tool to hide (erase) the second layer


See the Above Panel while you select the Brush Tool


Now Start Erasing the background of second Image


Now you can place the second layer image as per your requirement


If you want to recover or back your original image then Turn-off layer Mask


conclusion:- This is the reason why we use the layer mask rather than the opacity option. we can recover back our original image as well as we can edit/erase the image as per our need.


Wednesday 27 July 2016

The Background Eraser Tool In Photoshop

The Background Eraser Tool In Photoshop

To follow some Steps:-


1>Selecting The Background Eraser Tool


2>Adjusting The Size Of The Brush


3> Set image as Background (The Layers panel.)


4>Start erasing blue sky


5>Now see background is erased and layer become 0.


6>Attaching other background

    Import other image which you want to place in background


7>Place new image in below layer


8>Now adjust the background image


Thursday 21 July 2016

Type On A Path

Creating Type On A Path In Photoshop

Follow Few Steps:-

Step 1: Select The Ellipse Tool

Step 2: Change The Tool Mode To "Path"


Step 3: Draw Your Path

Step 4: Select The Type Tool

Step 5: Click On The Path And Add Your Type


Result be like this:-


Wednesday 20 July 2016

Place An Image In Text With Photoshop

Place An Image In Text With Photoshop

> It is easy to do using clipping masks

Step by step demonstration

Step 1 > Open New Image from your computer


Create Duplicate The Background Layer


click to create duplicate layer


Duplicate layer is created


Step 2 > Add A White Solid Color Fill Layer


Step 3 >   Select Layer 1
           >   Drag The Solid Color Fill Layer below Background copy


Step 4> Select The Type Tool
          > Choose Your Font


Step 5 > Add Your Text
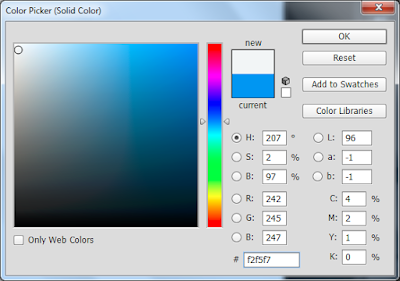
           >   Set Your Type Color To White
           >  Drag The Type Layer Below Layer 1


Step 6 > Select Layer 1 Again


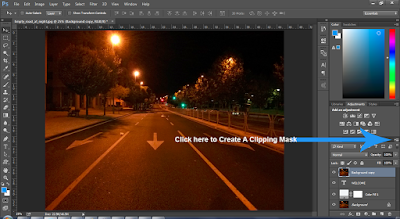
Step 7 > Create A Clipping Mask

1st click on side icon as per showing in image below


2nd you will get new window as given image below select as per displaying in image


Step 8> Select The Type Layer
                Resize And Reposition The Text Using Free Transform 


Scale the Text using Free Transform 


Step 9 > Add A Drop Shadow 

1st click on fx.


You will get below window and select Drop shadow


While you click on Drop Shadow, you will get below window


Now see the image 


You can hide the other layer as per given below screen


And save/export as png/jpg/gif format